
Welcome to the world of React Native! If you’re new to mobile development, React Native is a powerful framework that allows you to build mobile applications using JavaScript and React. This guide will walk you through the basics of React Native and help you get started with your first mobile app.
1. What is React Native?
React Native is an open-source framework developed by Facebook that enables developers to build mobile applications for both iOS and Android using a single codebase. It leverages the power of React, a popular JavaScript library for building user interfaces, but instead of targeting the browser, React Native targets mobile platforms. This allows developers to use the same knowledge and skills to build both web and mobile applications, providing a seamless development experience.
2. Why Choose React Native?
- Cross-Platform Development: One of the primary advantages of React Native is its ability to create applications that run on both iOS and Android from a single codebase. This reduces development time and effort and ensures consistency across different platforms.
- Hot Reloading: React Native supports hot reloading, which allows you to see the results of your latest changes immediately without restarting your app. This feature significantly speeds up the development process by providing real-time feedback and reducing the time spent on recompiling and redeploying the app.
- Large Community: Being an open-source framework, React Native has a large and active community. This means you can find numerous libraries, tools, and resources to help you solve problems and enhance your app. The community also contributes to the continuous improvement and evolution of the framework.
- Performance: React Native uses native components under the hood, which ensures high performance. While it’s not as performant as fully native applications in some cases, it provides a good balance between performance and development efficiency.
3 .Pre-Requisites for Starting React Application:
Basics of React and JavaScript: If you are new to react development world, it is necessary for you to spend a few hours learning the basics of JavaScripts and React. You probably utilize the free crash courses available on YouTube, I will highlight a few in the end for a better understanding learning experience.
4. Environment Setup in Your Device:
It is an important step to learn and build React applications. You must have the following steps done before delving into the technical aspect:
- Install Node.js: Download node.js from this official website: https://nodejs.org/en, a JavaScript runtime that allows you to run JavaScript on your computer, and npm (Node Package Manager) is used to manage JavaScript packages.
- Install Java SE Development Kit (JDK): React also requires JDK setup on your computer, make sure you have the latest version of Java JDK installed on your PC.
- Install Expo CLI: It helps you build seamless react applications and test them. It can be installed by opening your computer terminal and running the following command:
npm install -g expo-cli
- Installation of Coding Studio: If you are going to develop a mobile application and want to use React-Native, it is necessary to install Android Studio and configure it. You can check the official documentation of how to set up Android setup: https://reactnative.dev/docs/set-up-your-environment. Also, you can use VS code for development.
Hurray! Your environment for developing React-Native applications is done.
5. Creating the First React-Native Application:
- Open Expo CLI to create a new project using the following command:
expo init MyFirstReactApp
- Move to the project directory using the following command:
cd MyFirstReactApp
- Now run your first project by starting the development server using the following command:
expo start
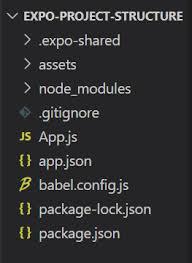
Figure 1 Directory Structure of Your React App
6. Building Your First React Native Component
Let’s create a simple component to display “Hello, World!” in your app. This will introduce you to the basic structure and syntax of React Native.
- Open App.js in your project directory.
- Replace the contents with the following code:
import React from ‘react’;
import { StyleSheet, Text, View } from ‘react-native’;
export default function App() {
return (
<View style={styles.container}>
<Text>Hello, World!</Text>
</View>
); }
const styles = StyleSheet.create({
container: {
flex: 1,
backgroundColor: ‘#fff’,
align-items: ‘center’,
justify-content: ‘center’,
},
});
- Save the file and see the changes in your app.
7. Understanding the Code
- import React from ‘react’;
This line imports the React library, which is necessary for using React components.
- import { StyleSheet, Text, View } from ‘react-native’;
This line imports components from React Native. Text and View are two basic building blocks in React Native. Text is used for displaying text, and View is a container that supports layout with flexbox, style, and touch handling.
- function App() { … }
This defines the main component of your app. In React Native, the main component is typically defined as a function that returns a JSX (JavaScript XML) element.
- <View> and <Text>
These are JSX elements. View is used as a container for layout purposes, and Text is used to display the “Hello, World!” message.
- StyleSheet.create({ … })
This is used to define the styles for your components. In this example, we create a style object with styles for the container, such as flex, backgroundColor, alignItems, and justifyContent.
8. What’s Next?
Now that you have a basic understanding of React Native, here are some next steps:
- Explore Components: Learn about other core components like ScrollView, FlatList, Image, and more. These components provide essential functionality for building complex mobile apps.
- State Management: Dive deeper into state management with hooks like useState and useEffect. Learn how to manage more complex state and side effects in your app.
- Navigation: Integrate navigation using libraries like React Navigation. Navigation is crucial for building multi-screen apps.
- APIs: Fetch data from APIs and display it in your app. Learn how to make network requests and handle asynchronous data.
- Styling: Learn advanced styling techniques to make your app visually appealing. Explore themes, animations, and responsive design.
Following are useful sites to kick-start your React-Native Journey:
Happy coding!